Safety Wiring Grips
Grips are a consumable item, they wear out over time and need replacing. Sometimes the handlebar needs to be replaced, either though bending in a crash, or change in preference in the bend. Your current grips would need to be either transferred to a new bar, or replaced. I always replace them. Grips are also a very personal thing, everyone has a preference as to what they want in a grip. The diameter, the pattern, and even the type rubber all come into play. Personal preference can change over time. For years I preferred the thin Renthal medium compound diamond pattern grips. These days I have changed to the slightly thicker Renthal medium compound waffle pattern grips on all of my motorcycles. I loved the feedback and direct feel of thin grips, but as I got older my hands could no longer cope with the vibrations that the thin grips passed into my hands. Grips are generally inexpensive ($10-$20 a pair), and in most cases, easy to replace. It is important to make sure they are properly secured to prevent them from spinning. A spinning grip can be the least annoying, and at the worst dangerous. From the factory most motorcycle grips are glued in place, and this is an option when replacing them. In some cases the grip assembly is pre-glued to a sleeve and bolted to the handle bar, this is become a more common option on the aftermarket side. Personally I use a few wraps of safety wire to secure my grips to the bar. I have found it to be a much cleaner and easier method than grip-glue, and it saves a lot of time in future grip replacements. Below is the step by step walk though of the process of grip removal, replacement, and safety wiring of new grips. Please note, if you have factory heated grips this method will generally not work, most factory heated grips I have found are of the bolt on type, with a non-replaceable grip. Clicking on the tools listed below will link you to some websites where you can buy them.
Required Tools:
Safety Wire Pliers
Safety Wire
Razor Blade
Optional: Grip Cutter
Step One – Remove the Grip
I have never been one to try to save a set of grips if replacing a handle bar, like I mentioned above. If the bar is being reused I will simply cut the old grip off. A razor blade down the center of the grip will allow the grip to be pealed off. If you have an aftermarket heater grip element under your grip that you will to keep you will need to be careful not to cut it. I recommend cutting a little on the end, and as you peal the grip back make small cuts avoiding the element.
Step Two – Prepare the Bar
Once the grips have been removed, clean up the bar and throttle tube. They need to be free from any residual glue. A wire brush can help with this process. If the throttle tube has molded in ridges to hold a factory grip, carefully cut them off if you are planning on using an aftermarket grip, otherwise your new grip will feel lumpy. Wipe both grip surfaces down with some rubbing alcohol or brake cleaner to ensure they are free from oil.
Step Three – Prepare the Grips
Depending your the grips you are using and bike you are installing them on, this section might not include much. For streetbikes you can buy grips with the ends cut out already, for off-road 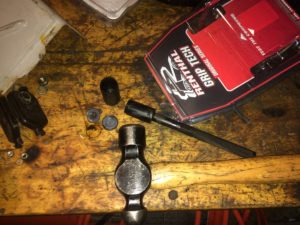 applications the grips often have an end. If you have bar-end weights or handguards the ends will need to be cut out. I have used a razor-blade or Exacto knife in the past to remove the center of the end. I invested in the Motion Pro grip cutter to cleanly cut the ends out a while back, it is a small investment but worth it. The tool is a round cutter on a rod that gets inserted into the grip, with both 7/8” and 1” (for the throttle side) cutters. It is inserted into the grip, then tapped with a hammer to cut the rubber grip. Lubing the inside of the grip with a squirt of brake cleaner will allow the cutter on the tools to easily slide down to the end. Either way, the end of the grip needs to be cut out if there will be something (bar-end weight or handguard mount) run though it. Prepare your grips, or skip this step if you have nothing mounting to the end of you handle bar.
Step Four – Mounting the Grip
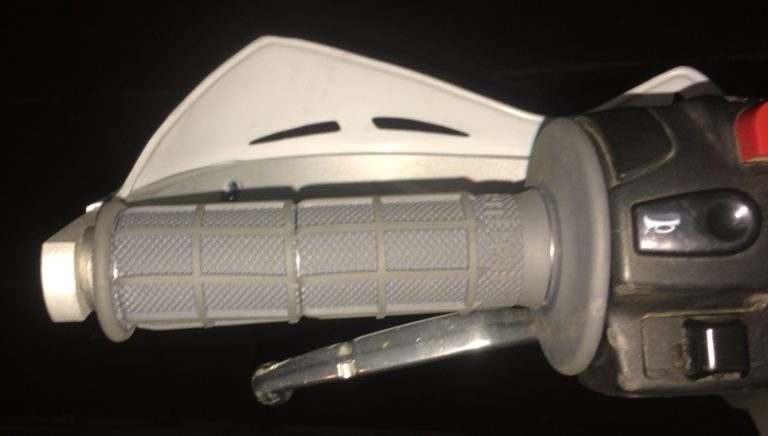
I am sure reading on-line you will find many options on how to do this. You’d smear grip glue on at this point if you were going down that road, some will recommend using hair-spray as lube, and I am sure there are many other recommended methods out there. Personally I spit into the grip tube, use my finger to smear it around some, then flick the grip to remove the excess spit. Regardless of what your girlfriend might have told you, yes spit can be a lubricant. Now slide the grip on. If you do it right, it will slip on easily, then get harder to slide on as you get closer to fully into place. You will probably end up stroking it on the last little bit. The final step will be to rotate the grip so the pattern is even on both sides. I also will ensure the manufacturer name (Renthal in this case) is pointing up in the case of a grip with a constant pattern. This part needs to be in your mind when installing the throttle-side grip, leave the name slightly to the rider side of top. That will allow you to rotate against the full closed throttle stop. Also line up any lines (such as on the waffle grips I like to run) to make the grip install look clean and professional.
Step Five – Install the Safety Wire
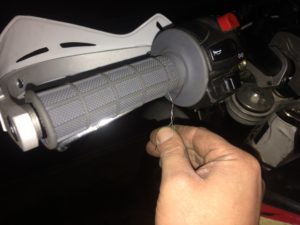
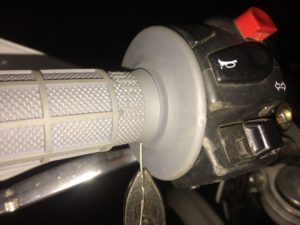
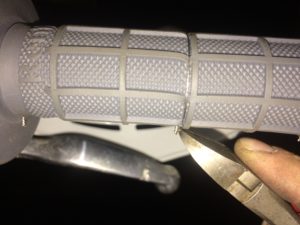
Finally we get to the guts of what this is all about, the safety wire. I always go with three wraps per grips. I have seen five wraps, but never have felt that was required, but go nuts if it feels right. On most grips there will be a grove at the base of the flange of the grip, and another at the other end. Sometimes you will have some groves in the middle. In the case of the Renthal waffle grips I am installing here, there is no middle grove and I just tuck in in close to the center rib. If there an not any ribs just put it where it feels right, the tightness of the wire will suck the wire into the rubber. Using 6”-7” strands of wire place them over the grip and give each a twist by hand, there will still be plenty of slack in the wire. This will allow you to get the wire right where you want it. Next you will use the safety wire pliers, clamp onto the twisted part of the wire, and lock the tool. The safety wire pliers will have a knob to pull to twist the wire tight. Try to have where the wire meets at the six o’clock positionIt will take a little practice to get the feel for the correct amount of tension to put on the wire. I will normally get it close and give the pliers a half twist or so by hand holding the pliers. Cut off the excess wire off with approximately five twists remaining. I will normally use diagonal cutters to push the tail flat into the rubber, you could also use the safety wire plier. The two outside wires will get pushed in towards the center of the grip, and the center will go inboard.
In Closing
If you don’t love your grips, try something new. If your grips are worn out, get some new ones. Glue is still an option, but I will always use safety wire now. I find it is just quicker, cleaner, easier, and simply works better. Be safe out there, have fun, and Godspeed.
-Eric Archambault

