
1979 Vespa P200E – Engine Rebuild
I have made a point to call this an engine rebuild, rather than a scooter rebuilt. As I mentioned in the last 
post, this engine is going to find a home in my 1976 Vespa Sprint Veloce. It has been a few months since an update, and honestly much of that was spent with me being lazy during the cold winter months. About a month ago I made a number of large parts orderers for this project, mostly for this engine, and a few for the Sprint chassis. The chassis upgrades will be covered separately, but here is what is going on with the engine.
The Engine To-Do List
- Mazzucchelli Race Cut Crank
- New bearings though-out the engine
- Degrease and clean cases
- Banded clutch, heavy clutch springs, and fresh clutch plates
- Malossi 210 Top-End
- New seals though-out the engine
- New hardware though-out the engine
- Clauss Studios Swingarm and Shock Mount Bushings
- Fresh Gaskets
- 26/26Si Carb
- Port Match the Engine Cases
- Install Boomstick Exhaust
Listed like it is above it looks to be a short list, and honestly it isn’t that bad at all. Really not much is remaining of the donor engine other than cases, transmission, and electrical bits. Cleaning the cases was probably the biggest pain to do. Luckily I live alone, and much of that was done in the kitchen sink, in the kitchen the oven and freezer were also used durning this process. This isn’t going to written as a “How to guide,” rather an overview of what I did. Maybe next time I will break it down more, but plenty of other folks have already done that.

Port Matching
The port matching was one of the most important parts of the task of installing the Malossi 210 top-end. To skip this step is to leave much of the potential power of this upgrade unused. It is also an intimidating step, I was going to be irreversibly modifying the stock engine cases. Even though I could have completed  this step months ago, I waited until I had ordered the remainder of the parts needed for the project. My only answer to why I waited is, my garage was cold and I couldn’t finish the project anyways.
I brushed on Dykem layout fluid onto the cases, and with the Malossi cylinder slipped into place, used a scribe to mark the Malossi port dimensions. After that I went to work with my air die-grinder. I used a Home Depot Husky brand die-grinder, but the carbide burr cutter was from a proper industrial supplier. That carbide burr tore through the aluminum cases like a hot knife though butter. The small stock ports doubled in size to accommodate the new Malossi 210 top-end, and enabled the promised performance from Italy to be unleashed. I followed the die-grinder with some good old fashioned hand finishing. While I was a machinist, years ago 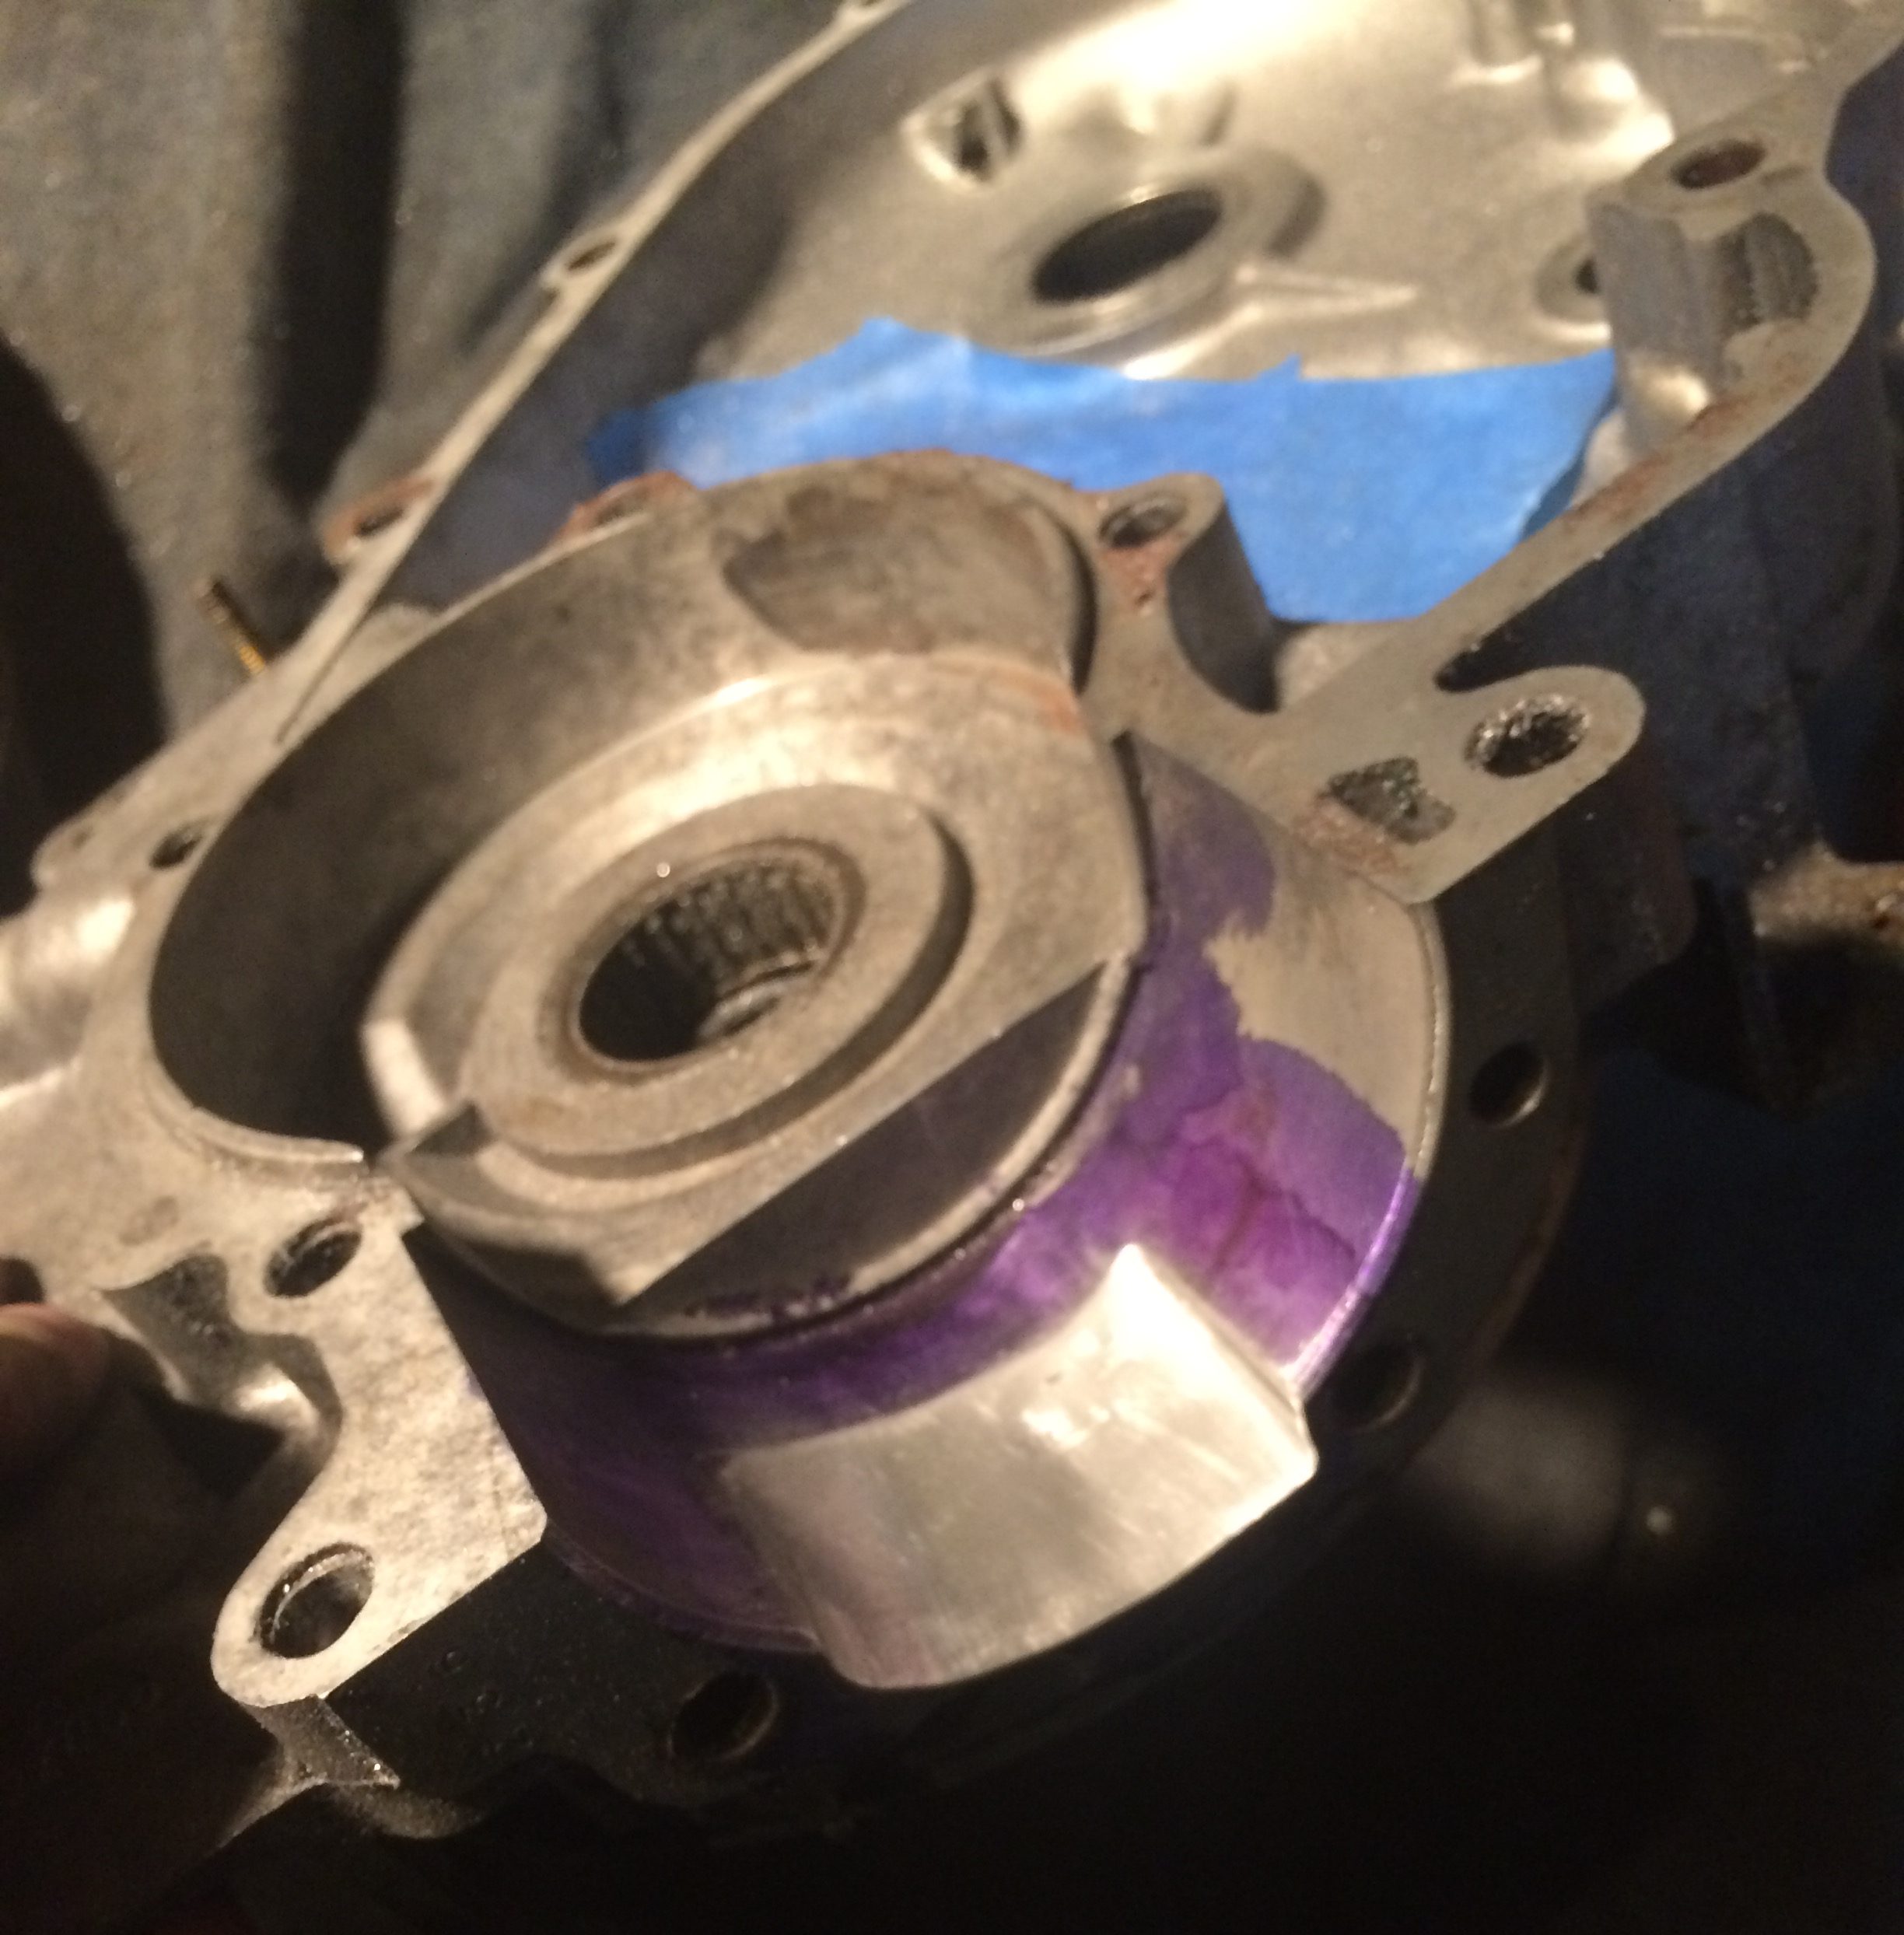 fresh out of high school, I spend a summer doing hand finishing. This process is an easily forgotten procedure during making parts. The finish on the intake ports that I just modified is not critical, but I wanted them to look clean. It is a mater of pride for me, I do not want the next guy to open an engine I have rebuilt to have any aspect of my work to question. I did, during this process punch a tiny hole on the flywheel-side case intake port. The correct way to fix this would to be having it welded, I didn’t want to wait for that. I used Quik-Steel to patch the hole externally. I have no doubt it will hold fine for the remainder of this engine’s service life. I could have easily glossed over that fact, but it felt dishonest to not share my mis-steps during this process. Once the cases were properly modified they received their final degreasing.
Clauss Engine Mounts
Clauss Studio swingarm and suspension mounts are one of those vintage Vespa modifications that is now a standard upgrade if you want a good handling scooter. I have read the horror stories of having a vibrating machine due to them, but I guess I will report on that later. Going into this I knew I wanted better handling, the BGM suspension will be the other part of this process. Having owned both an early KTM 620 and a first generation aluminum framed Honda CR250R, I knew the vibrations wouldn’t be that bad in comparison. After feeling the Clauss Studio mounts I doubt I will have a problems. While they are much stiffer than stock, they still have a bit of give. I’m going to guess old Clauss did it right when selecting the material.
Since I was thoroughly degreasing and washing the engine case in my kitchen sink, the stock swingarm mounts were all warmed up and ready to come out. It took very littler persuasion with a flat-blade screwdriver and penetrating oil to remove them. After a healthy rinsing with brake cleaner the cases were ready to accept the new Clauss Studio mounts. They went in easily as their instructions told that they would. Honestly this job took less than an hour, when I did similar work on my 1972 Husqvarna 400CR to remove brass bushings I spent hours. I cannot say how happy that it was quick and easy. I look forward to enjoying the performance upgrade afforded by these mounts once the machine is on the road.
Bearings and Seals
At this point I turned my attention to the engine bearings, and their seals. I normally would have just thrown the cases into a preheated oven at 275 degree Fahrenheit, and let science do the work. This time around I used a propane torch to warm around the bearing, then with an appropriately size socket,  knocked each bearing out. In a few cases I had to use a punch since a socket wouldn’t fit. One by one the bearing came out, and from the freezer their replacements slowly marched into the cases. Use science my friends, hot expands, cold constricts.
Since I stopped for the night after installing the bearing, I forgot which way the seal went. I tried to install the clutch-side main seal backwards, when I realized my mistake I had already damaged it. Luckily I have an awesome vintage scooter shop locally, Big People Scooters. On my lunch-break I stopped by and grabbed a new seal. That installed without issue, when I tried installing it correctly. With the flywheel seal I also made a mistake. The inner race on the flywheel side is pressed onto the crank. I’m used to old dirt-bikes that has ball-bearings on both sides. In cases like the old dirt-bike cases (pun intended) I am used to just pressing the case half together. If I was reusing a crank this would not have been an issue, but since I had a fresh crank, I needed to press than inner race on first. After another stop at Big People Scooters for yet another seal I wrapped that up.
Clutch
I switched from the stock clutch to a banded clutch basket during this rebuild. I figured since I was stuffing a bit more power into these P200E cases, a tougher clutch was called for. I looked at BGM race clutches, as well as a few others. Ultimately, I figured a banded stock basket was good enough for now. Anyways, only the clutch spring caps and the inner hub were reused. The new clutch plates soaked in an oil bath on my kitchen counter for a few days before putting it all back together with new parts.
Where is project this sitting now?
I have everything that I need to finish this project that I can think of on hand. Honestly I could have thrashed over 2-3 days a month ago when the last batch of parts arrived and finished this. I have strived to  keep moving forward in that time. I have also taken my Husqvarna TE450 dirtbiking, worked on special projects for my real job, and laid on my couch being lazy. Here is the list found above as it sits currently.
The Engine To-Do List
- Mazzucchelli Race Cut Crank – Installed
- New bearings though-out the engine – Installed
- Degrease and clean cases – Completed
- Banded clutch, heavy clutch springs, and fresh clutch plates – Installed
- Malossi 210 Top-End – Cases Prepped
- New seals though-out the engine – Installed
- New hardware though-out the engine – Installed
- Clauss Studios Swingarm and Shock Mount Bushings – Installed
- Fresh Gaskets – Installed
- 26/26Si Carb
- Port Match the Engine Cases – Completed
- Install Boomstick Exhaust
Right now, I just need to de-burr the Malossi 210 cylinder’s ports and bolt it up. The installing the carb, bolting it into the frame, and connecting the engine electronics to the chassis electronics only remain. This is very project is very close to being complete. On the chassis side I am also installing BGM Tuning suspension, encompassing new dampeners and springs on both the front and rear suspension. The joining of the stock US market 1976 Vespa Sprint Velcoe 6v battery with turn signal wiring loom to a 1978 Vespa P200E double yellow wire engine will be covered in detail when completed. This is where the project sits now, after months dormant, though still in my thoughts, ring-a-ding sounds will soon come. I am sure future updates will be swifter than this one. Be safe out there, have fun, and Godspeed.
-Eric Archambault
